ArgoBot Drive Training
Here you'll find some tutorials to write drive code for the ArgoBot (or any robot) using LabVIEW or C++
This project is maintained by FRC1756-Argos
Tutorial 2: Arcade Drive
Now that we’ve got a driving tank drive robot, let’s try something more interesting: arcade drive! This exercise will skip over some of the more detailed steps covered in the tank drive tutorial, so you may want to refer to that tutorial if you get stuck.
What is “Arcade Drive”?

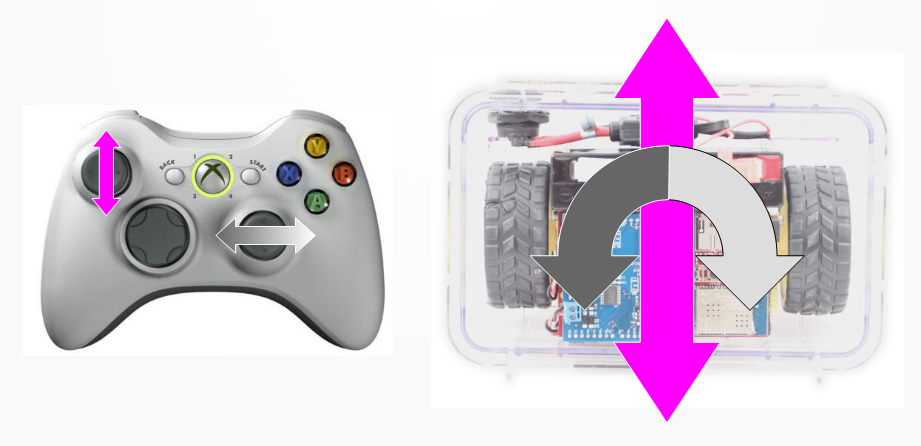
Arcade drive may be more familiar, because it is the basis of many video games. One joystick moves the robot forward and backward, and the second joystick turns left and right To do this, we will make the left joystick set a value for both motors and the right joystick will increase or decrease the motor speeds to turn the robot This control scheme offers less driver control, but it’s easy to learn and many drivers enjoy it.
If you have some experience programming, try implementing this drive control now. Otherwise, read on for step-by-step instructions.
Control Design
To make a working arcade drive, we need to implement the following:
left_out = left_y + right_x
right_out = left_y - right_x
You may notice that we add right_x to the left output and subtract from the right output.
This has the effect of increasing the left output and decreasing right output for positive x values, and the opposite for negative x values.
Having a speed difference between the motors causes turning.
Note that we still have to invert the left motor as we discovered in Tank Drive. We need to make sure we continue to include this inversion.
If you have any ideas on how to do this, try it on your own before following the step-by-step instructions.
C++
Initial Setup
Just like Tank Drive, we’ll start by:
- Create a new subsystem named
DriveSubsystem - Add left and right motors to
DriveSubsystem - Add an Xbox controller and the drive subsystem to
RobotContainer
If you’ve already implemented another drive setup, you can reuse that here and we’ll modify. Otherwise, you can follow the detailed instructions in Tank Drive.
Add Motor Control Logic
- Let’s start by opening
DriveSubsystem.h - Create a new function declaration for the Arcade Drive logic. We will have two input parameters: one for the forward speed and one for the turning speed. This will be a public function like in Tank Drive.
void ArcadeDrive(const double forwardSpeed, const double turnSpeed); - Now open
DriveSubsystem.cppand add a corresponding function definition.void DriveSubsystem::ArcadeDrive(const double forwardSpeed, const double turnSpeed) { } - Based on the description of arcade drive in the first section, we’ll have to implement this control logic:
left_out = forwardSpeed + turnSpeed right_out = forwardSpeed - turnSpeed - Let’s add this logic to the body of
DriveSubsystem::ArcadeDrive()void DriveSubsystem::ArcadeDrive(const double forwardSpeed, const double turnSpeed) { m_leftDrive.Set(ControlMode::PercentOutput, forwardSpeed + turnSpeed); m_rightDrive.Set(ControlMode::PercentOutput, forwardSpeed - turnSpeed); }
Update Controller Mapping
The basics of this will be the same as Tank Drive, but now we’re going to use a different drive function and different joystick axes.
- Open
RobotContainer.cpp - In the constructor, modify the
m_drive.SetDefaultCommand()call so it uses your newDriveSubsystem::ArcadeDrive()function instead ofDriveSubsystem::TankDrive(). We need to make sure the y axis is still inverted.m_drive.SetDefaultCommand(frc2::RunCommand( [this] { m_drive.ArcadeDrive(m_controller.GetRawAxis(static_cast<int>(frc::XboxController::Axis::kLeftY)) * -1, m_controller.GetRawAxis(static_cast<int>(frc::XboxController::Axis::kRightX))); }, {&m_drive} ));
Try It Out
- Connect to the WiFi for the robot.
- Open the FRC Driver Station. You should see green communication with the robot

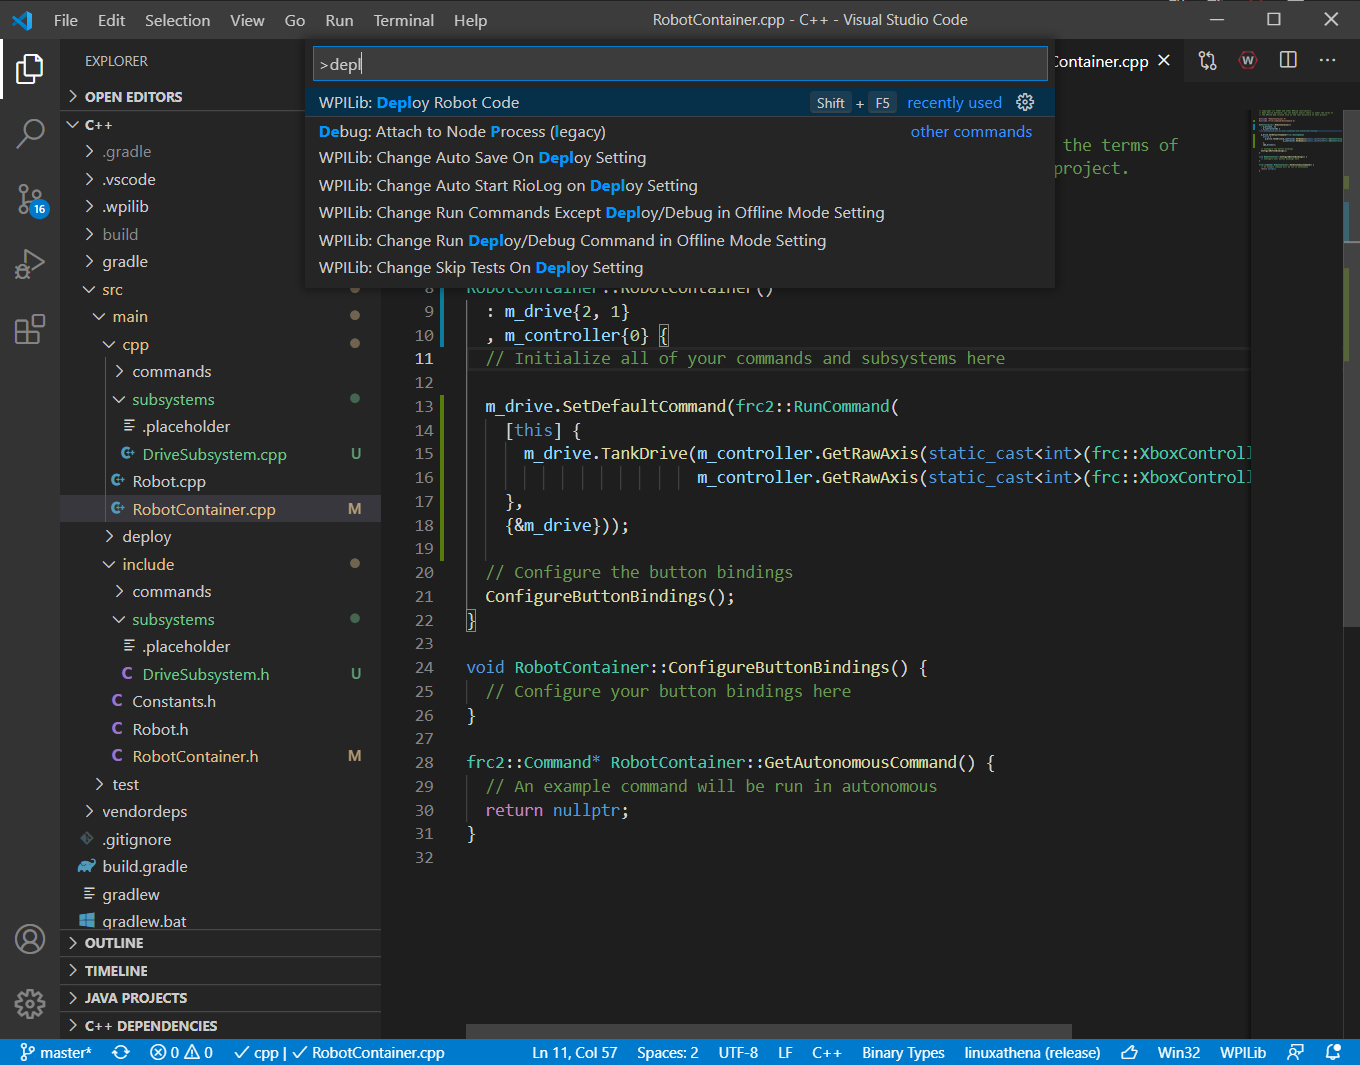
- Back in VSCode, press Ctrl + Shift + P to get your command pallette and select
WPILib: Deploy Robot Code
- Return to the driver station. Make sure your controller is plugged in, stand clear of the robot, and enable the robot.
- Try driving the robot. Make sure to disable whenever you are not holding the controller.
LabVIEW
Open and Unbundle Joysticks
Just like tank drive, we’ll start by opening the drive VI and unbundling the joystick values we want.
- Open
Drive_Arcade.vifrom the project explorer - Go to the block diagram
- Using the tool palette, insert an “Unbundle By Name” block
- Connect the unbundle block to the
Joystick_Incontrol - Expand the unbundle to 2 cells
- Select
Joystick.Y_Axis_LeftandJoystick.X_Axis_Right
When you are complete, you should end up with the following:

Implement the Design
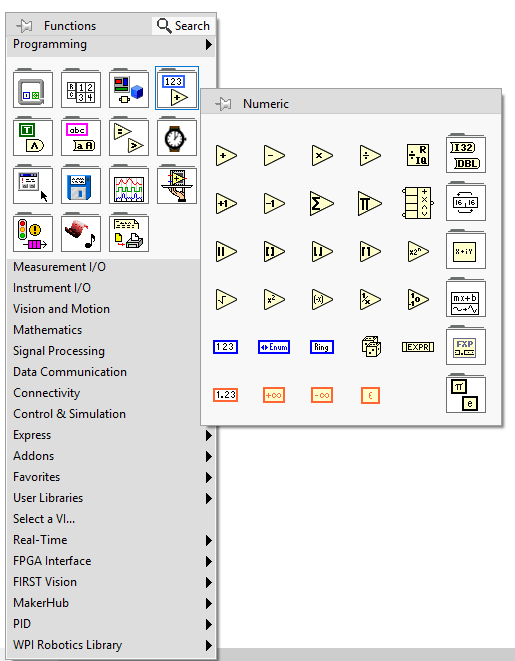
For this design, we will be using blocks from the numeric palette as shown below:

Note that we’ll be inverting the left motor like in Tank Drive.
- First, we’ll make something that looks like the tank drive, but with only input from the left joystick.
This will take care of the forward/backward drive component.

- Now, use the insert command to add “add” blocks to both motor wires.
- Add the
right_xjoystick value to both motor wires
- Save your VI
Try It Out
Now that we’ve got a new drive control VI, let’s try driving with it.
- Open
ArgoBot_Main.vi - Go to the block diagram
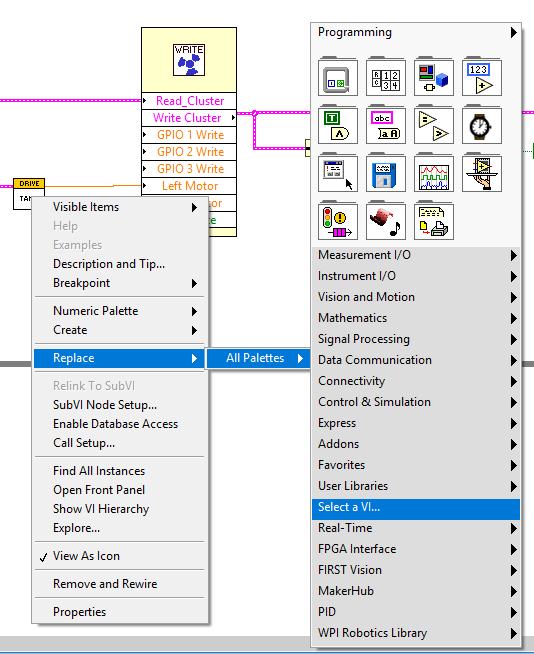
- Right click on the
Drive_Tankblock and select “Replace”>”All Palettes”>”Select A VI…”
- Select
Drive_Arcade.vi - Save and run the VI
Try driving it a little to see what you do or don’t like. You’ll want to improve on the design in future exercises.
What did you like more or less about this drive style? Is there anything that makes it hard to drive?
Congratulations! Now you have two different drive styles under your belt! Next up: button drive!
| <-Previous | Index | Next-> |